
Updated in March 2015
One of the most common questions I hear is “How do I add a Paypal button to my Glosite?” Many of you ask after seeing the incredible PayPal registry that Fenella and Stuart used on their wedding Glösite gift page.

I’ve also seen Glö-bies use PayPal buttons to collect funds for events that are a part of their celebration, such as baseball games, cooking lessons, wine tours and the like. I love how creative you all are!
So for those who are curious – here’s a quick tutorial on how to add a PayPal button to your website:
PLEASE NOTE: The code on Paypal buttons is known to conflict with frames, which is what is used to play music on your Glösite. Apologies, but you will need to decide whether you would like to have music OR Paypal buttons on your site – they won’t work together.
Step 1: Log into PayPal

Step 2: On the left side of the page, click on Seller tools > Selling Preferences
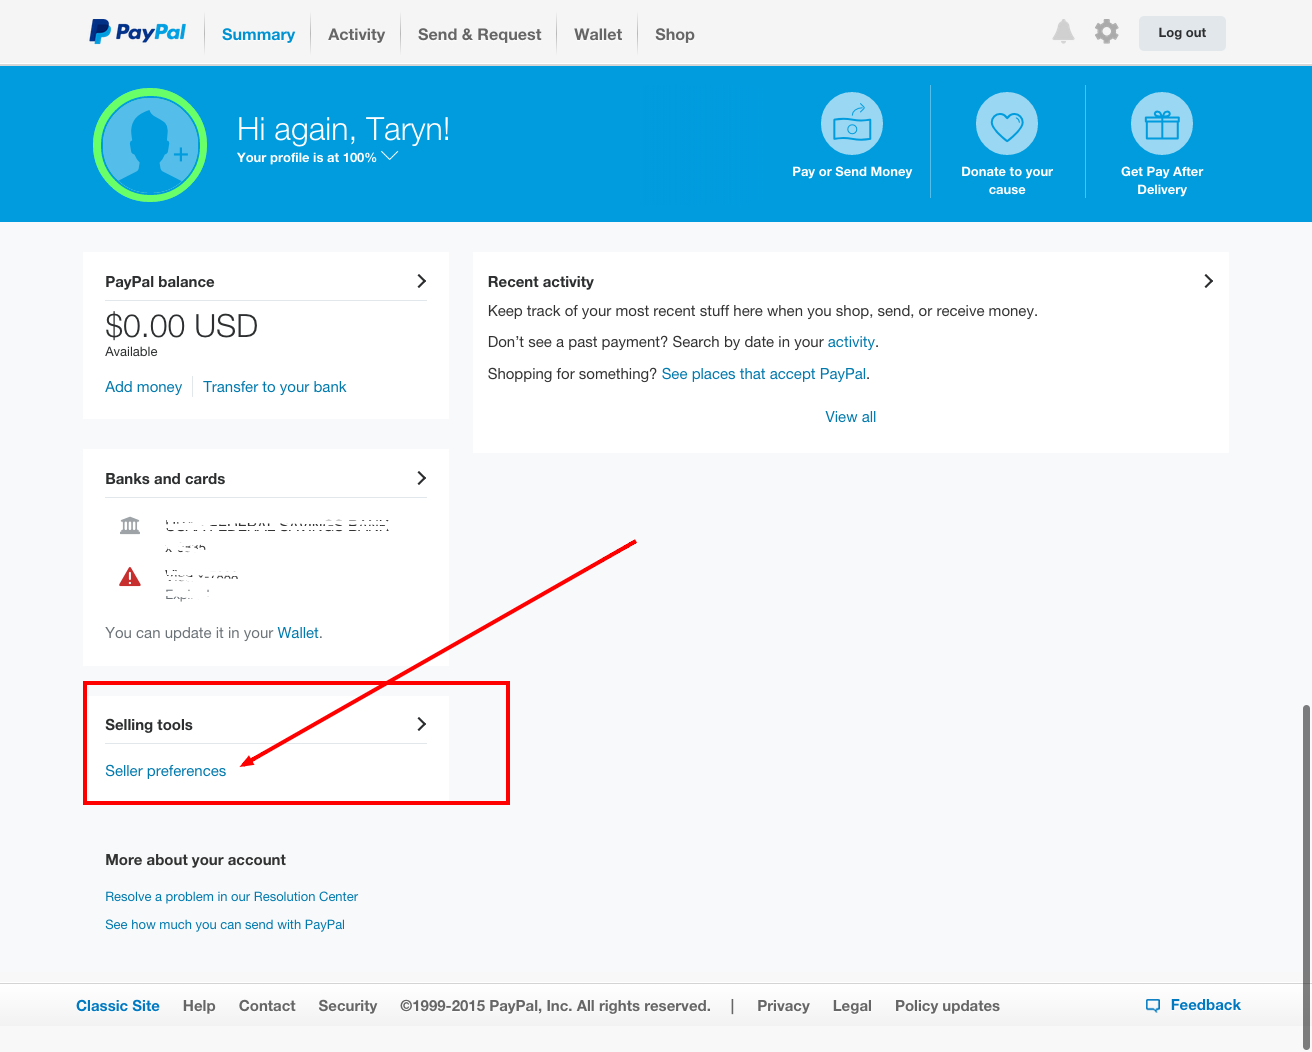
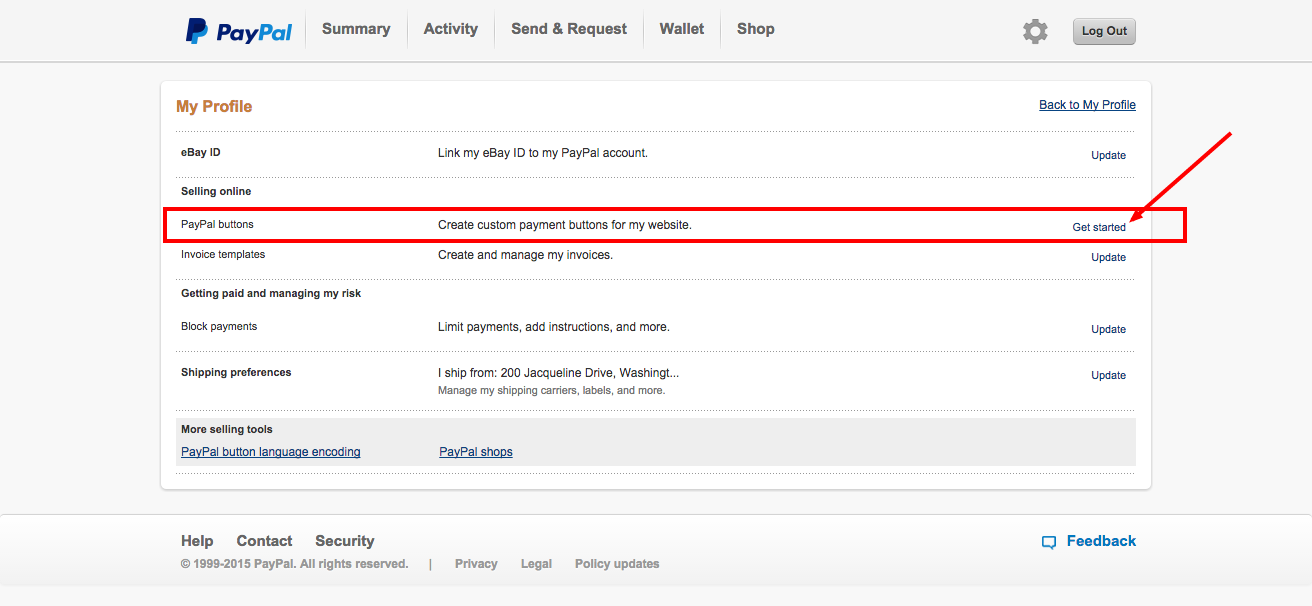
then click “get started” in the Paypal buttons section
Step 3: Choose the type of button you’d like to add from the drop down menu.
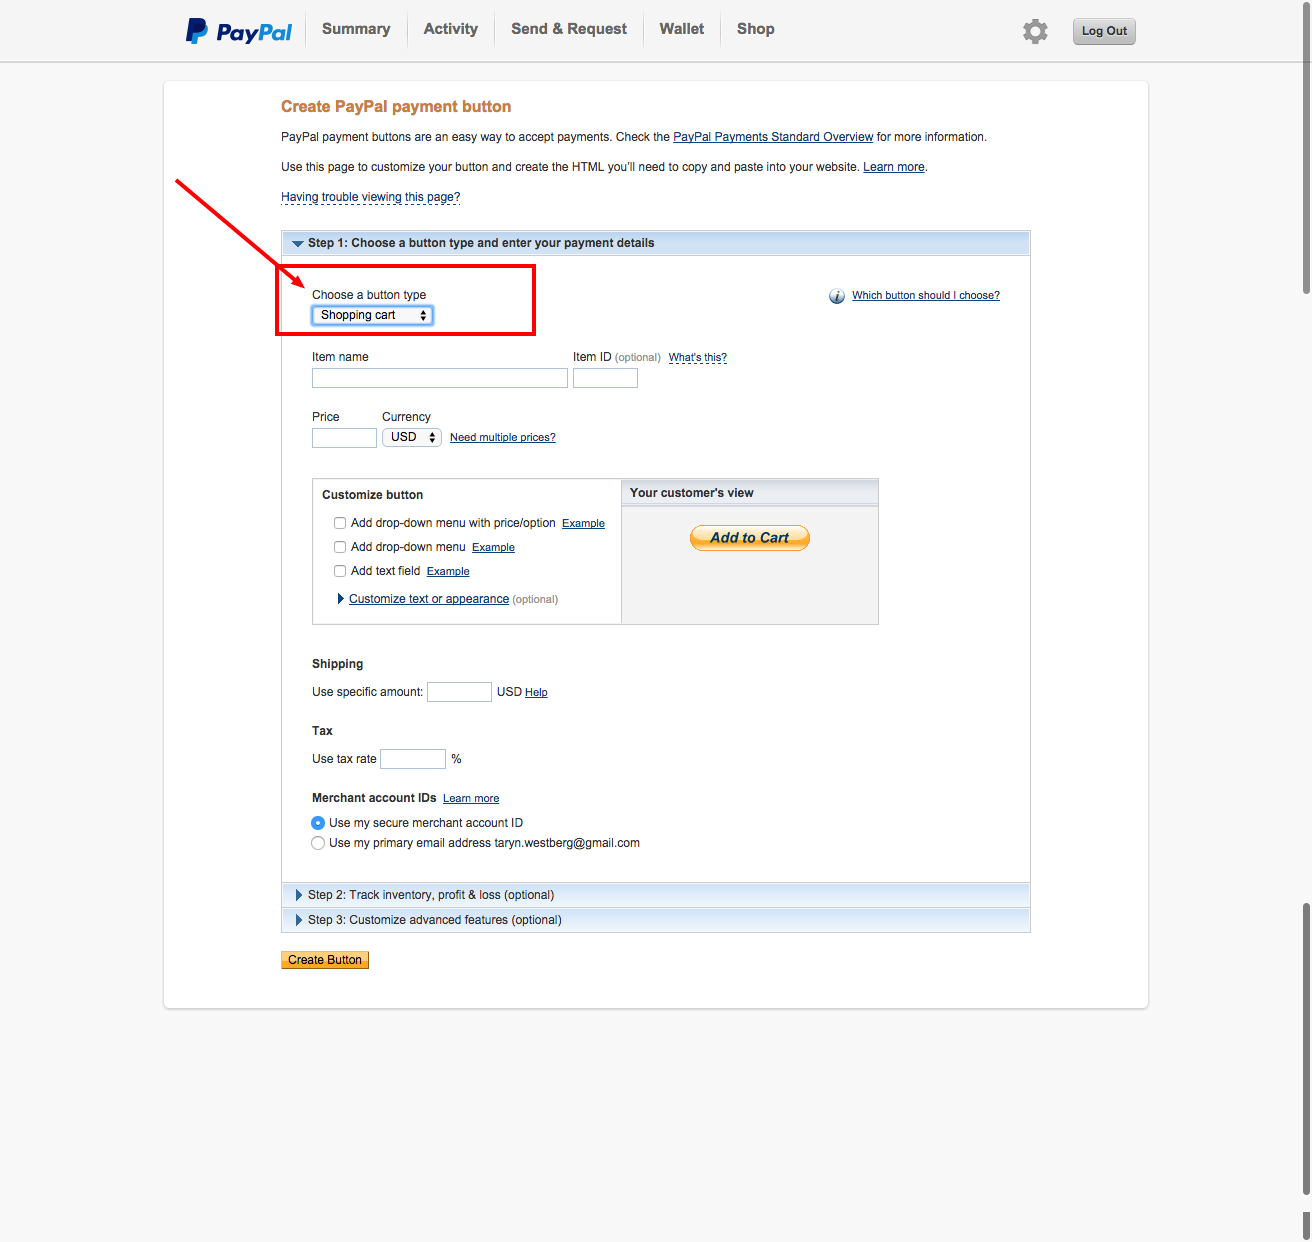
Step 4: Customize your button – experiment with different button types and options until you get the look/feel and functionality that you’re going for

When you’re finished – scroll to the bottom and click on “Create Button” (which may also say “Save Changes”)

Step 5: copy the code for your button

Step 6: Log into your Glo account and go to “Manage Glösite (your website)” > “Edit” for the page where you’d like for the button to appear. You can add the button to the bottom of the page by pasting the code into the widget box:

OR…if you want to add the button in the middle of the text on a page, use the “HTML” feature on text editor menu. Click the “HTML” button, and then position your cursor where you’d like the Paypal button to go and then paste in the code and save. Here’s a tutorial on how to use the HTML feature

That’s it!
Have you used a PayPal button in a new, creative way? I’d love to hear about it in a comment below…